# 盒模型
Flutter中的盒模型(Box Model)与Web开发中的盒模型类似,
它定义了组件如何根据其内容、内边距(padding)、边框(border)和外边距(margin)来确定自己的尺寸和位置。
# 主要组成部分
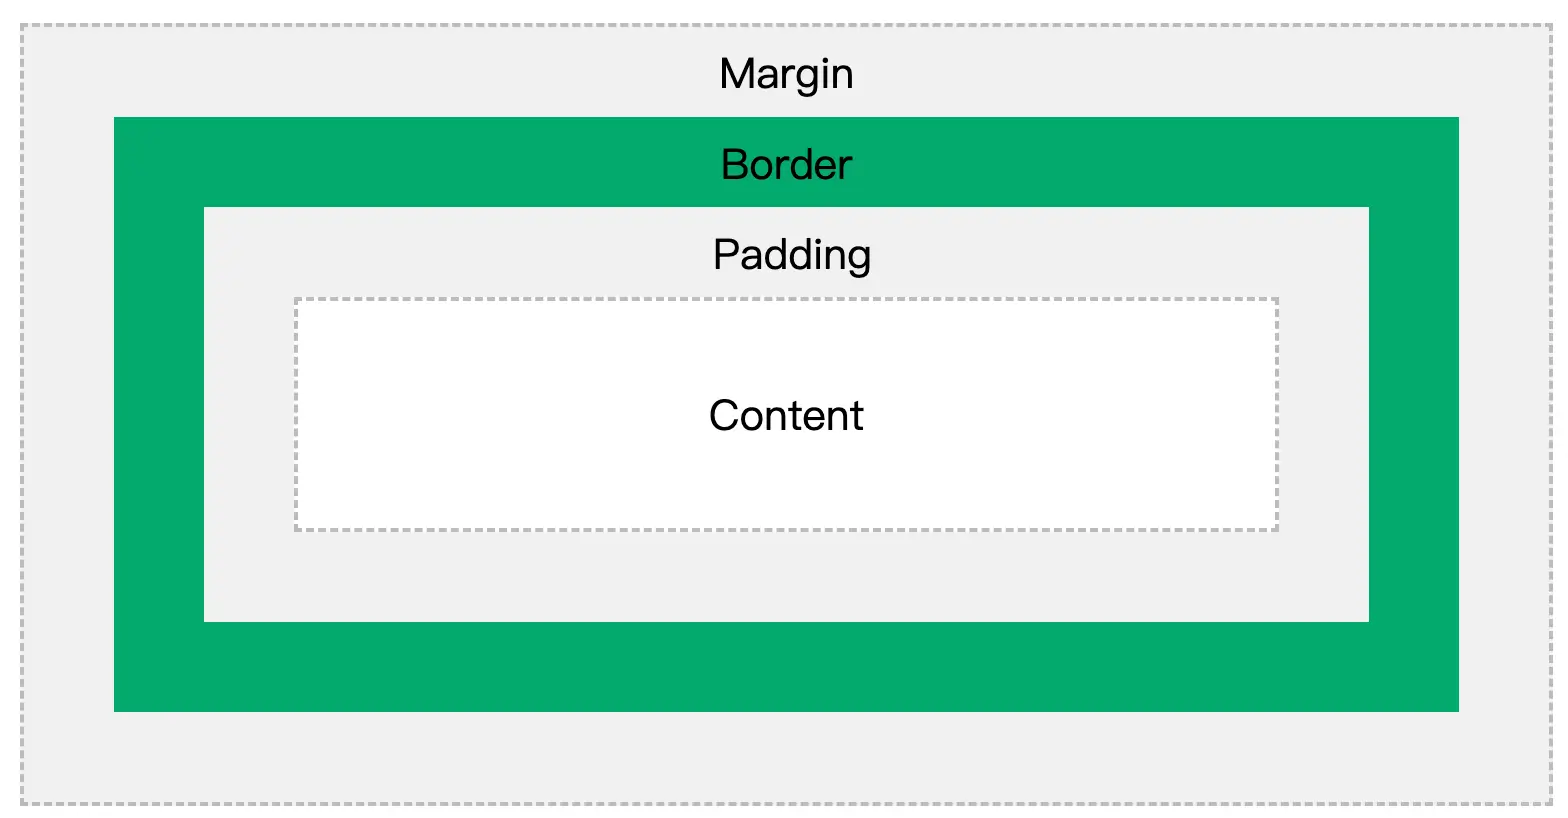
| 名称 | 说明 |
|---|---|
| Content | 内容 |
| Padding | 内边距 |
| Border | 边框 |
| Margin | 外边距 |
# 核心规则
Flutter中的盒模型布局遵循以下流程
- 上层组件向下层组件传递约束(constraints)条件。
- 下层组件确定自己的大小,然后告诉上层组件。注意下层组件的大小必须符合父组件的约束。
- 上层组件确定下层组件相对于自身的偏移和确定自身的大小(大多数情况下会根据子组件的大小来确定自身的大小)。
# 特点
- 组件对应的渲染对象都继承自RenderBox类。
- 在布局过程中父级传递给子级的约束信息由BoxConstraints描述
BoxConstraints定义了组件可以拥有的最小和最大尺寸:
const BoxConstraints({
  this.minWidth = 0.0, // 最小宽度
  this.maxWidth = double.infinity, // 最大宽度
  this.minHeight = 0.0, // 最小高度
  this.maxHeight = double.infinity, // 最大高度
})
1
2
3
4
5
6
2
3
4
5
6
# 实例
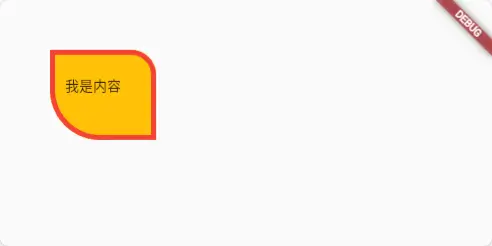
在实际开发中,Container是实现盒模型最常见的组件,它可以用来创建一个盒子,控制其尺寸、外边距、内边距和边框。
class MainApp extends StatelessWidget {
const MainApp({super.key});
Widget build(BuildContext context) {
return MaterialApp(
home: Scaffold(
body: Container(
margin: const EdgeInsets.all(50),
padding: const EdgeInsets.fromLTRB(10, 20, 30, 40),
decoration: BoxDecoration(
color: Colors.amber,
border: Border.all(
color: Colors.red,
width: 5,
),
borderRadius: const BorderRadius.only(
topLeft: Radius.circular(0), // 左上角半径
topRight: Radius.circular(25), // 右上角半径
bottomLeft: Radius.circular(50), // 左下角半径
bottomRight: Radius.circular(0), // 右下角半径
),
),
child: const Text("我是内容"), // 内容
),
),
);
}
}
1
2
3
4
5
6
7
8
9
10
11
12
13
14
15
16
17
18
19
20
21
22
23
24
25
26
27
28
29
2
3
4
5
6
7
8
9
10
11
12
13
14
15
16
17
18
19
20
21
22
23
24
25
26
27
28
29